RAID is not back-up by Andrew Dacey

Decided to try something new with the blog part of my site. My day job is in IT so I decided to start doing some technology posts with a photography slant. Trying to get into the habit of blogging more often so as part of that I'm going to see if I can make this a weekly feature for the site. I'm going to call this series "Tech Tuesdays". The goal is to have something new posted every Tuesday. For the next couple of weeks I'd like to hit on storage and back-up and how to protect your photos. So with that in mind, I'm kicking this series of with RAID is not back-up. I've seen several cases where people mistakenly thought that they didn't need to back-up their data because they have that data on a RAID system and I wanted to clear up what a RAID is for and why you still need a proper back-up strategy.

What is RAID?

Let's quickly cover what a RAID is. RAID stands for Redundant Array of Inexpensive (or Independent depending on who you ask) Disks. In a nutshell, it's a way of combining a number of disks together for performance or reliability.

There's a number of different styles of RAID (referred to as levels) but the basic idea is that 1 or more of the drives should be able to fail without you losing all of your data (that's where the redundant part comes in). Since photographers tend to have a large collection of photos and would perish the thought of losing them RAIDs tend to be a popular storage solution.

The different RAID levels and how they work is well covered elsewhere so I'm not going to go into it further here. If you need more information, the Wikipedia article on RAID is a good starting point.

Reliability vs. Back-up

The important thing to realize is that RAID is about reliability for keeping a disk system up and running, this is also referred to as high-availability. The point is that a drive can fail and the system will keep running. This is very useful, especially if you're working under a deadline but it's not a back-up.

The purpose of backing up is to have a second copy (or preferably, multiple copies) of your files. If you accidentally delete a file you want to be able to recover it, RAID doesn't offer this. Ideally your back-up strategy should include at least 1 off-site copy of your data, a RAID system doesn't do this. The important thing to realize is that while theoretically the RAID system may contain more than 1 copy of your files it's not stored in a manner that can allow for you to easily retrieve these files. The purpose of a RAID system is to recover all of the data when a drive fails, not for recovering a single lost file.

A warning about RAID 0

There's a specific level of RAID called RAID 0. This RAID level, also called striping, spreads your data across more than 1 disk. However, there is no redundancy in the data. What this means is that if any of the disks fail the entire RAID system will go down, which means you will lose everything on the RAID. That's important enough to repeat, you will lose everything.

RAID 0 is all about performance, not reliability (arguably, at the expense of reliability). If you need that performance then a RAID 0 system can be very fast, but it's important to understand that you're playing with fire unless you have a solid back-up strategy. All hard drives fail at some point and the idea of losing several disks' worth of data because of a single disk failure should be terrifying. I know a lot of people chance it with a single disk in terms of not backing up, do not do this with a RAID 0 system, you will lose your data at some point.

When to use RAID

There's nothing wrong with RAID, just make sure to use it for what it's intended for. RAID can be a great way to create a high capacity back-up system that can also handle 1 or more drive failures. Similarly, RAID 0 can offer performance that simply can't be matched by most single-drive systems, just make sure to keep my warning above in mind. Combine RAID 0 for your main data with a solid back-up strategy and you can have high performance and peace of mind.

In other words, use the 2 for what they're intended for. Back-ups protect your files while RAID protects your disks. If your budget allows for it then combining both options is great. The important thing to remember is that if you have a solid back-up strategy then you can still recover from a total disk failure whereas a RAID on its own doesn't protect you from accidental changes or deletions of files. So if you can only afford one then go for a solid back-up solution first.

Getting a shot out of your head by Andrew Dacey

A bit of a random image this time. This is about a block from my house and a couple of weeks ago when I was on a walk I spotted the wall and the fire hydrant and I just knew I had to shoot it. It's kind of hard to explain but I could just so perfectly see this shot in my mind and I couldn't get it out. At first I went through all of the doubts about if it was even worth shooting and whether I should even bother with it. But, I just couldn't stop picturing it in my mind.

In the end I shot this if for no other reason than to get it out of my head. I got to a point where I knew I just had to get it out or it would keep bugging me. I knew that I had to shoot it and see if I could capture the scene as I'd visualized it. I took the mindset that even if the shot was a complete failure that I could at least try to learn from it.

In the end? I found the original shot a little flat but otherwise it was pretty much as I saw it in my mind. I knew I wanted to crop it wide to really simplify the shot and emphasize the repeating pattern in the wall. At first I thought I'd crop things a little tighter to cut off the bottom of the side-walk and the top of the wall but in the end I decided I liked it better with those included. The one thing I had really hoped to get was a person around the left side of the image. I was hoping to get a good amount of motion blur of the person so they were more of a shape rather than an identifiable person. In the end though it was just too bright to get that kind of a long exposure and I didn't have a neutral density filter to take down the shutter speed. I did take one shot with someone positioned where I had in mind but it just didn't work with their clothes and not being blurred so I went with this shot instead.

As mentioned, the original shot was a little bit flat so I decided to see where I could take it with some post processing. I'm worried that I may have taken this one a little too far and crossed over into the realm of effect for the sake of effect but I've sat with it a few days and am still pretty happy with it. In the end though this was really more about just taking the shot I needed to take. Now that I have it's out of my mind and I've been able to move onto other new ideas. Sometimes that's all an image needs to be.

Backyard BBQ by Andrew Dacey

2011-04-12_backyard-bbq_0020.jpg

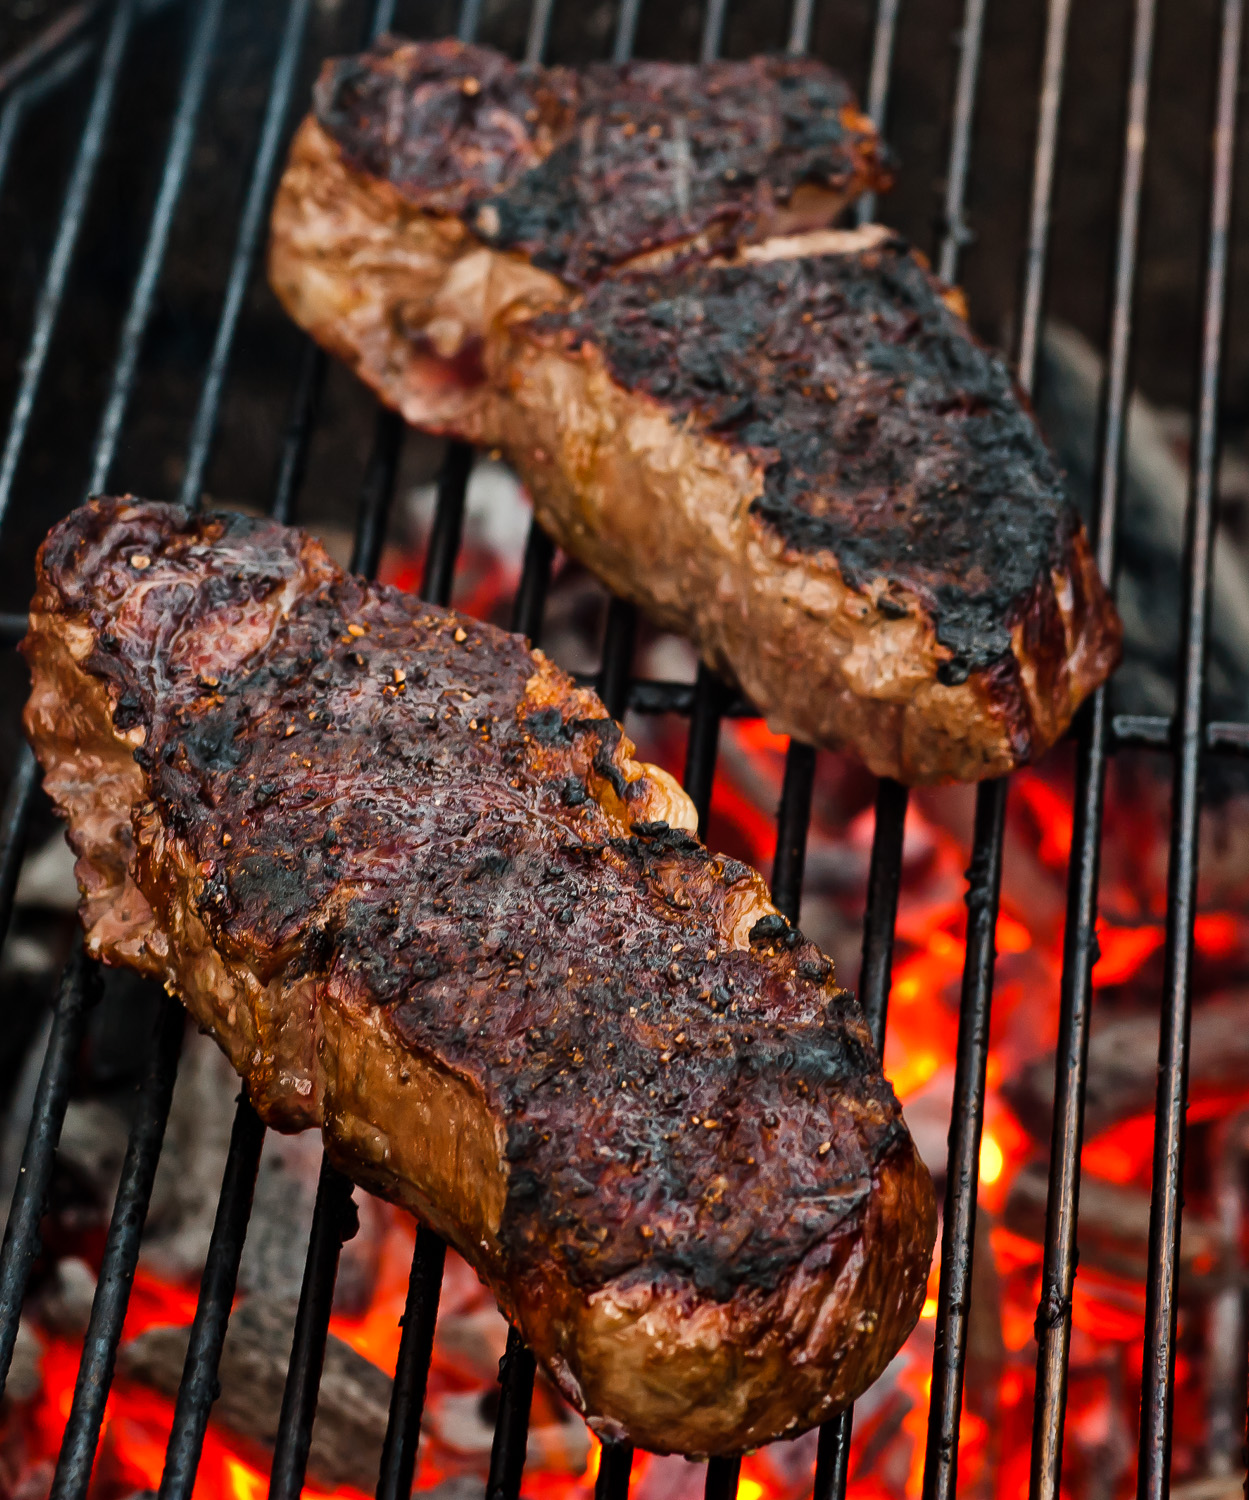
Continuing with my experimenting with food photography I recently took my camera out while grilling some steaks on my Weber charcoal BBQ. All of the food is real, as is the fire. And in case anyone is wondering, I have no relationship with Weber or any charcoal companies. I do happen to think that Weber makes a pretty good grill though.

Again, I used my Tamron 90mm 2.5 macro lens for these shots. I really like getting in close and capturing details of the food and this lens is great for that. It is manual focus though but that's not as much of a drawback when shooting macro photography (or near macro in this case).

What proved to be a bit more of a challenge was using the camera handheld. I was really tired that night and almost didn't take my camera out to shoot the food as it was cooking. In the end though I decided to bite the bullet and try to get a few shots since I'd be out there anyway. But, this meant that I was being a little lazy and didn't take my tripod out. In some ways that was useful as it really allowed me to work quickly but I did also loose a lot of shots due to being slightly off in my focusing since the depth of field is so shallow when working this close.

All of this was shot with natural light, it was in the evening and the sun was starting to go down so I got fairly soft light as my main light. I also really like how the fire adds a nice underglow in a lot of the shots I selected here. I feel this really helps add to the feel. I ended up shooting in continuous low quite a bit for this shoot in order to increase my odds of capturing flames or sparks. I also think this helps improve your chances when shooting macro as slight shifts in movement while shooting can really throw off the focus and shooting continuously really helps improve your odds of getting a few shots that are sharp where you want them to be.

As I think I've mentioned before, it's really important to me to shoot real food and that food be eaten. I really don't approve of the idea of faking the food, especially in a way that makes it inedible. I understand that the goal is to get the best shot but I think the amount of waste just doesn't justify it. I really want to push the idea of "honest" or "real" food photography. Right now that poses some challenges for me though since I'm usually the one cooking the food too. This means that I have to work fast when shooting and also keep an eye on how the food is doing so I don't ruin it in the process (as it's likely to be my supper as well). That also explains why there haven't been any people in my food shots to date. I'd really like to shoot some photos of chefs working and I'm hoping that this practice will help get me ready for that kind of experience as well as give me a body of work to show when I approach someone with the idea.

Making Montreal, pt. 2 by Andrew Dacey

This is part 2 of my how-to series on how I did the post-processing on my Montreal images. If you haven't already read part 1 then I strongly recommend starting there first.

Camera Raw

As mentioned in part 1, the first piece of flexibility you get with this workflow is in being able to re-visit your raw developing settings after you see the effect. This first image shows what the initial effect looked like for this particular image. In this case, I was very happy with the black and white image but I wanted to adjust things after I saw the effect. In this case, I liked what I was seeing in the mix of cold and warm light from taking this shot relatively early in the morning and I wanted to emphasize that further.

Since I was working with a smart object, this is a simple matter of opening the smart object from the layers palette which puts you back into Adobe Camera Raw. The one downside I found with this workflow is that I much prefer working in Lightroom and while the adjustments in Camera Raw are the same the interface isn't so I do find I'm not as efficient working in Camera Raw. In this case though, I simply made some modifications to the saturation for the blues and the yellows.

This produced the second image shown here. Overall, I was happy with the look but I found that in some specific areas things had gotten a little too blue and I wanted to tone that down. Again, I was able to go into Camera Raw and make some adjustments, this time, I used an adjustment brush to reduce the saturation in the areas I wasn't happy with.

While not shown here, I also tried further adjustments to the saturation, vibrance and  colour temperature before arriving at the settings used in this case.  The point is that you still have all of your raw developing tools  available to you. The one caveat is that the preview in Camera Raw will  only show its effects, it won't show the effect of the filter. This  means that sometimes you have to make a change and then hit okay in  order to see what it will look like with the smart filter applied. Once  you get more familiar with what you're trying to achieve and how the  colour and black and white are interacting this will get easier.

Silver Efex Pro 2

For this second image I was happy with the colour in the image but there were some things I wanted to tweak in the black and white conversion after I saw the effect. Again, this is where working with smart filters really comes in handy as you can always get back into the settings and adjust. I find this is much easier than having to undo the filter and then re-apply it, especially if you want to work iteratively by making small changes and seeing the effect. Once you get the feel for the image and how the black and white effect is working with the image you can start targeting the shortcomings more precisely and you may not have to move back and forth as often.

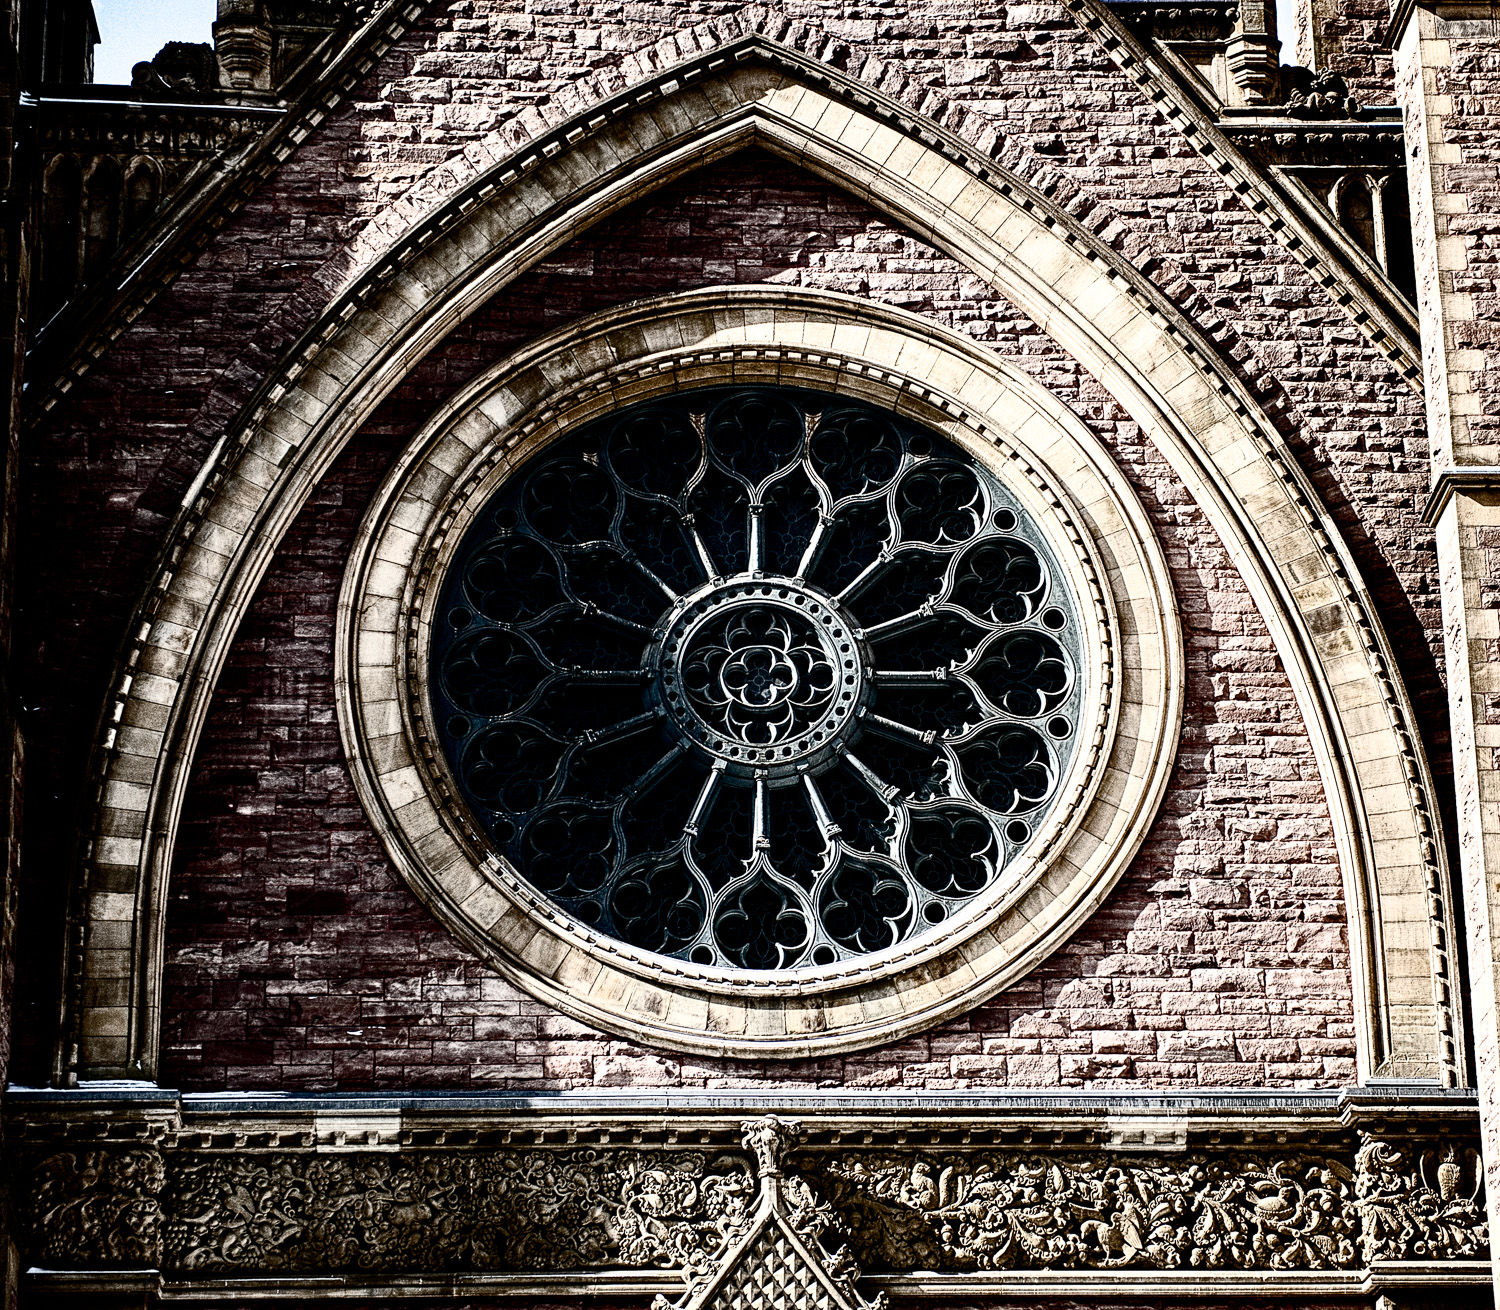
In the case of this image, I was relatively happy with parts of the image but I wasn't happy with the snow in the sky looking too dark (in several spots they were dark grey blobs instead of white flakes) and I felt that the top of the skyscraper was too faded out. In this case, I used Silver Efex Pro's "U-Point" technology to add several control points to adjust this. First, I brought down the flakes in the sky so that they faded away more. After that I darkened the top of the building to make it more prominent. This also had the fortunate side effect of isolating the top of the building from the effect in the sky. After that I worked on adjusting the church to even out the exposures so that it was neither too dark nor too light. I also made some adjustments in the tree on the right side of the image as I felt it was blending in too much with the church and getting lost. Adjusting the black and white conversion helped give the separation I was looking for.

As you can see from the screenshot in Silver Efex, I made significant use of the control points to get to the final image. What's nice is that all of these can be tweaked either in groups or independently. I can also turn off any of the points at any time or delete them entirely. That's definitely one of the huge perks to working with a plug-in that gives this much versatility and control.

As I made such an extensive use of control points in this image I've decided not to include images from every step. Since this is a 3rd party plug-in I also didn't want to get too bogged down in the specifics of using this one plug-in. The point though is that you can adjust the black and white conversion to suit your purposes. In some cases you need to get past the fact that the goal is not necessarily to produce a pleasing black and white image, the goal is to produce a pleasing effect with the colour. In some cases this means making changes to the black and white that don't work for that but do work once the colour is added.

Final Notes

One final note about this if you're working with Lightroom, I highly recommend not making further adjustments in Lightroom after applying this effect. The reason for this is that if you want to go back into Photoshop to adjust your effect later then you won't be able to take these Lightroom edits with you. The reason for this is that if you chose to edit in Photoshop with the Lightroom adjustments then you'll get a brand new image created (as either a TIFF or PSD file, depending on your preferences) which will not retain the smart objects or smart filters from before. Instead, you need to use "edit original" if you want to get back to your original PSD document with these still available. This is a little counter-intuitive and not how you would normally edit images from Lightroom so I wanted to make sure to mention it here.

Making Montreal, pt. 1 by Andrew Dacey

A little later than I'd hoped but here's part one of my promised how-to on how I achieved the "edgy" look I was so pleased with in my Montreal shots. I'm not claiming to have hit on anything new here, but it was something new for me and it really helped achieve my vision for these shots and I felt like I hit on some good workflow items as well in trying to make this process non-destructive. This becomes important because it lets you come back to the image and make adjustments over and over again until you get things just right. In this first image that wasn't as important but in other images I made use of this in order to tweak the look of the effect after I saw the initial result. I hope to cover more of this in a follow-up to this initial post..

I shoot in Raw and it was important that I be able to adjust the Raw development settings after I saw the effect. This meant using smart objects was the way to go. In Lightroom, you can edit an image in Photoshop as a smart object so that's the root that I chose to go. Not only does this allow me to adjust the development settings later (using Adobe Camera Raw in Photoshop) but it also allows me to use smart filters, which as we'll see are another important part of making this a truly non-destructive workflow. If you're not working with a Raw image and will be applying the effect with an adjustment layer (see below) then there's no need to conver the layer to a smart object.

The key to this effect is treating the colour of the image separately from the light and dark values of the image (or the luminance). This involves creating a black and white version of the image which will replace the luminance values of the colour image. I think I originally heard of this technique on one of the photography podcasts I listen to, unfortunately I can't remember which one it was as I heard it some time ago but only thought to try it out when I was working on these images. Since you're treating the colour separately, you don't really need to worry about the overall contrast of the colour image, that will come from the black and white version of the image. That said, I think it's best to work with a colour image that doesn't have a lot of contrast so that you can better see the colour you're working with.

In this case, I was trying out a 15 day trial version of Nik Software's Silver Efex Pro 2 Photoshop plug-in so I used that to create the black and white image. Fortunately, Silver Efex will work as a smart filter. This is one reason why using the Photoshop plug-in is preferable to using the Lightroom plug-in. Previously I'd found that I wasn't very happy with my black and white conversions and I'd noticed a lot of other people seemed to be using Silver Efex so I decided to give it a try and I was extremely pleased with the results. I want to point out that I have no relationship with Nik Software and they have in no way compensated me for saying this. I was so pleased with the trial that I have purchased the Complete Collection.

There's no need to use Silver Efex, if you already have another method of producing black and white images that you're happy with then the effect will still work. In this case I'm using a filter which is why I wanted to use smart filters. If you're using layers or adjustment layers instead then you may not have to use a smart object, although I still recommend doing so if working with a Raw image (see above).

Now you simply need to merge the light and dark values (or luminance) of the black and white image with the colour values from the colour image. This may sound complicated but it's actually just a matter of changing the blending mode to luminance. If we were working with a normal layer or adjustment layer this would just require changing the blending mode next to the opacity slider on the layers palette. Unfortunately, for smart filters it's not nearly as obvious that this can be done but there is a little icon next to the filter that will allow you to adjust this (see the screenshot).

If you are going to use a filter to create the black and white image then I highly recommend using smart filters so that you can adjust that black and white image once you see the final effect. I went for a very contrasty black and white image in this series of images and I think that works for these particular images but it might not in all cases. One thing to remember is that you're taking the luminance values from the black and white image, this means that very dark values in the black and white will tend to show very little colour (they'll be so close to black) and lighter parts of the black and white image will tend to make the colours look more washed out. Similarly, a very light colour in the colour image might start to look a little garish if it's mixed with the wrong luminance value. All of this can be fixed, either on a global level or more locally but that's why it's so important to keep as much flexibility as possible in the workflow.

In part 2 of this series I'll go into this tweaking in more detail and show how I used the flexibility to adjust the image after I saw the initial effect.

Montreal: more exprimentation by Andrew Dacey

2011-02-26_Montreal_0039-Edit-2.jpg

I was in Montreal for a few days around the end of February. While the purpose of the trip wasn't for photo I did manage to grab a couple of shots. I hadn't shared them before as I was struggling with getting a good look that I was happy with.

In the end, I hit on a completely new method of post-processing these images (for me) and I got a very interesting "edgy" look for this photos. What's even more exciting, is that this workflow is still pretty streamlined and completely non-destructive. I can return to these images at any time in the future and completely tweak any aspect of the process quickly and easily. I hope to publish more on this in the next few days. In the meantime, I hope you enjoy these shots.

Experiments in food photography: Coffee by Andrew Dacey

I've been very interested in getting into shooting food and cooking lately. I'm a little late in getting these up, but here's some early attempts from my own kitchen when brewing a cup of coffee in my french press.Overall, for a first effort I'm pretty happy with these. I shot these with my old Tamron 90mm 2.5 macro lens. The lens is an old manual focus Tamron adaptall lens. I used to enjoy using it on my old Olympus OM bodies and was very happy to give it a new life by getting the proper adaptall mount to mount it on my Nikon D700.

One of the things that's very important to me with food photography is that I don't want to waste any food in the process or shoot fake, or otherwise inedible food. Because of this, I had to work very quickly to get these shots while the coffee was brewing (less than 5 minutes) and while the coffee was still hot as I fully intended to drink it.

I tried to get some shots of the kettle while it was boiling the water but I wasn't happy with how the shots of the steam turned out so none of them made the final cut. All in all, a fun experiment and I really hope to shoot more in the future.

Preparing for success by Andrew Dacey

There's the old saying that success happens when preparation meets opportunity (quick Google search attributes this to Henry Hartman). I've been thinking a lot about that lately and both in the ways that I feel I'm doing well and where I'm falling flat. In terms of what I do well is on the technical side. I can be ready to shoot at the drop of a hat. Give me 5 minutes and my gear is ready to go. A lot of this is to do with how I operate after a shoot.

  1. I never really unpack my photo backpack. At most, I'll pull the body out of the bag but that's it. This means most of my gear is ready to go in seconds.
  2. After downloading all my pictures and ensuring that they're backed up to a 2nd location (crucial) I format all my memory cards, this means they're all ready to go again.
  3. I reset the camera to my standard settings if I've adjusted anything for a specific shoot (like using a high ISO)
  4. I recharge the batteries, even if they're not run down

Okay, all of this means that if someone were to call me right now with a shooting opportunity I could be good to go, great.

Now, in the interests of disclosure, let's look at where I fall down. This would mainly be on the business side of things. I've gotten better at preparing model releases before a shoot but there's a lot of other things I still let slide. Right off the bat, I don't have any business cards or a portfolio ready. This means if someone is interested in my photography I really have nothing ready to promote myself, not good.

Earlier this week I did have someone ask me if I had any cards on me and I had to tell them no. Fortunately, this was more for getting in touch with me relating to some shooting I've been doing for them for free so it's not the end of the world but it's not great either.

Tonight, there was an industry event going on at Aperture Studios. I ended up having a schedule conflict and couldn't go but I started realizing that I didn't have anything to bring to that event. Given that I haven't been very active in the local photo community this would have been a great opportunity to network but not having any materials to show doesn't exactly send a good first impression.

I'm not posting this to beat myself up but more to point out that there really is more to the photo business than just taking pictures. It is a business and needs to be run as such. More and more I'm feeling that taking good photos and being good on the technical side just gets you in the door, but it's how you operate as a businessperson that really determines how successful you are, and a lot of that can just come down to how much you prepare.

Workflow: Lightroom to Wordpress by Andrew Dacey

One of the struggles I had with developing my photography website was in getting a really good workflow from Lightroom (my preferred image editing/cataloguing application) to Wordpress (my current content management system for the site). I think I've finally found a good combination of tools that give me a fairly smooth workflow. Lightroom is a great tool for editing and organizing your images. It also has some web export functionality included and LR3 includes publishing services as well. However, I wasn't very happy with the built-in web galleries and I wanted to find something that looked good but didn't rely on Flash.

On the Wordpress side of things, I wanted to find a good way to get my galleries into Wordpress so that I could make use of all the great content management it brings. I've seen plenty of tutorials which simply suggest creating your galleries in Lightroom with the web export functionality and then linking to them from within Wordpress (often while using some type of lightbox effect for the linking). While this does work, your galleries are completely external to Wordpress so you lose a lot of integration.

I began looking into gallery plugins and found that Nextgen Gallery was extremely popular and seemed to offer the features that I wanted. It includes a really nice upload tool and does handle resizing. I played with this for a little while by exporting my images to disk from Lightroom and then using Nextgen's upload functionality to add the images to a gallery, it worked fairly well.

This was a pretty good workflow but I wanted something more automated if possible. With LR3's new publishing services I began to wonder if there was one for wordpress. A search on Adobe's site turned up very new plug-in called Dossier de Presse. What this plug-in adds is an additional set of options to the export command in LR. Wordpress has an XML-RPC funtionality which allows for remote publishing and once enabled, you can use this plug-in to directly publish to Wordpress from within LR. Even better, the plug-in works with either the Wordpress media manager or Nextgen Gallery.

There's still a little bit of manual work at the very end to get things exactly how I like them but it's very smooth. Here's a quick outline of how it works:

  1. Select my images in LR and go to export
  2. Select Dossier de Presse as the destination (I've saved this as a preset)
  3. Rename the gallery name (I usually create a new gallery each time, but you can update an existing gallery as well).
  4. Hit export
  5. In Wordpress, update any details on the page (the plug-in is still very new so there's a few things I still tweak manually after creating the page)
  6. Publish the page
  7. Add the page to my menu (Wordpress 3.0's new menu manager makes this very easy)

I know that probably looks like a lot but in action most of this goes extremely quickly and in the end I have a page and a gallery both within Wordpress itself so then I can manage it from there.

The final tweak I made was to update the effect I was using for Nextgen. After some other experimentation I seem to have settled on the Fancybox for Wordpress plug-in. This worked out of the box with Nextgen but I have adjusted the settings so that Nextgen adds a rel element to gallery images and Fancybox only groups images with the same rel (these are both easily setup in the settings for the plug-ins). I set this up so that I can control when images group if I have multiple images on the same blog post.

New Gallery: Newfoundland 2010 by Andrew Dacey

2010-07-04_nfld-2010_14-1.jpg

In early July my girlfriend and I visited her parents in western Newfoundland.

I was very prolific in my shooting, coming back with 373 images. I've finally managed to cut that down to a reasonably sized gallery.

I don't often get the opportunity to shoot much landscape photography and I'm really pleased with how these shots turned out.

I'm also experimenting with a new way of displaying the gallery, I'd be interested to hear how people feel the thumbnails with lightbox effect works compared to the thumbnails beneath the full-size image. One nice feature is the lightbox effect I'm using (Fancybox) seems to be handling automatic scaling pretty well (for me at least) so I'm thinking that may solve some of the scrolling problems I was seeing with earlier galleries and vertical shots. If this works out well it's fortunately a very easy change to adjust the other galleries.

Check out Newfoundland 2010 and let me know what you think.

We are live! by Andrew Dacey

Well, after nearly a year after I registered the domain I've finally gotten this site live. I spent a long time working out different options for designing the site and how much I was willing to do by myself. In the end, I took the advice of a friend of mine who recommended to quit trying to build it from scratch myself (or coding my own templates) and to use some 3rd party themes and plug-ins instead. The result? A week later and the site is live, lesson learned.

I'm hoping to get a good workflow for the site so that it's easy for me to keep the posts coming fairly frequently. So far it seems like I've hit on a pretty good combination that lets me update things relatively easily and even integrates in with Lightroom so I'm pretty happy.